January 23, 2015
Let’s Get Crafty with DIY Valentine’s Day Centre Pieces! #Ad

This shop has been compensated by Collective Bias, Inc. and its advertiser. All opinions are mine alone. #CollectiveBias
Craft time is one of the best ways to fit in quality family time. A time to be silly and to experiment with new ideas and let the kids just be themselves. The holiday’s are a perfect time to get in some extra crafts and Valentine’s Day is no exception in our home. Each year we try to design a new craft – something different and unique for our family.
Since dinner time is important in our family (nothing beats that kind of bonding time!) and we have just recently started eating out in the dining room with our wedding dishes we thought a craft for our table would fit our family the best. Our table, while looking pretty with all the good dishes on it, was just looking plain:
Boring right?
So we thought, what better way to spice up our table than with Valentine’s Day themed centre pieces! We envisioned candles, candy, vases and with this in mind we headed out to Walmart to find some key pieces for our centre piece.
While I was checking out vases and supplies, our youngest son had the time of his life in the children’s crafting aisle – he would have fully stocked our cart if he was allowed to!
For our Valentine’s Day centre piece craft we purchased (and you will need to purchase to replicate!):
- two medium-sized candles and one large candle
- two small square vases
- fabric in a colour of your choosing
- cinnamon hearts
- glue gun and sticks
- white rectangular candle holder (we actually used a white appetizer tray for our craft!)
- heart stickers
- Valentine’s Day themed ribbon
- clear wrapping paper
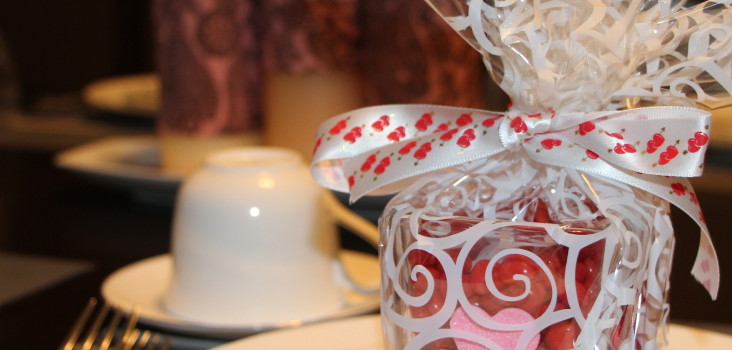
Start first with the small glass vases (since this was our kid’s favourite part!). Choose which stickers you want to apply on to the glass and apply the stickers directly onto the glass. Fill your glasses with the cinnamon hearts. Wrap them up with the clear wrapping paper and tie off in a bow with the ribbon.
Cut the fabric into rectangular pieces. The length should be enough so that the fabric will stretch around the candle once and just slightly overlap.
Using the glue gun, glue the under side of the left side of the fabric onto the top part of the right side of the fabric. Make sure that you are pulling the fabric tightly to ensure that it does not slip off the candle. Word of advice – don’t apply the glue from the glue gun directly onto the candle (yes, I can admit it – I made this mistake and completely blame the lack of coffee and pure exhaustion). Also be careful with those fingers! I managed to apply the glue directly onto my fingers – ouch!
Now comes the best part – arrangement!
Place the three candles onto the white candle holder (or in our case the app tray). Place hearts around the candles.
Voila! A beautifully Valentine’s Day themed decorated centre piece. The best part is that it can be changed and updated when the season changes.
Because the children in our life play such an important role in our life and it is important to us to let them know we love them, we decided to use the vases as a place setting. We put each vase on the children’s plate and it was a wonderful companion to our centre piece and the kids loved their extra surprise.
How do you update your home decor to celebrate Valentine’s Day? Do you have a special craft that you like to make each year?


Really pretty. It’s the little things that make life special.
What great ideas! I love the idea for the centerpiece – so simple but so lovely! And the extra surprise is so sweet. #client