Remember my post from last week about Miraculous: Tales of Ladybug and Cat Noir (that also includes an awesome DVD giveaway)? Now you can print out your own colouring pages for these two amazing characters. Printable colouring pages are one of the best ways I have found to keep my children happy at home!
Click on the link below to bring up the PDF images of Ladybug and Cat Noir. Enjoy colouring with your children and share your colouring with me online.
March Break is only a few days away and while the kids are super excited for a week off of school, if you are like me you can probably already hear the dreaded, “I am SO bored!”. It’s inevitable that every year we hear this at least once during the week. We do not go away during the March Break, mostly because of the cost of travelling during this time period so we have to think of unique and different ways to keep the boys active and enjoying themselves throughout the week every year.
Over the last six years, we have learned some pretty good ideas on how to keep them active not only physically but mentally too and that wont break the bank!
Two weeks before March Break, we always create a five day calendar for the week with an am/pm slot for each day. We sit down as a family and talk about what we really want to do during the week, what is a must and what is a maybe. Then we start putting the items into place.
Every day we choose one physical activity (swimming at our local pool, playing at the park, indoor family gym) to do in the morning or if the weather is bad we can switch it to the afternoon. Keeping them physically active is necessary so they get their energy out in a constructive manner. Our local community centres have fantastic swim and open family gym times that work well for our schedule.
In the afternoon, we like to keep their minds and hands busy with crafts. I don’t think anyone ever stops loving the feel of making something with their hands whether it be a painting, colouring a pre-drawn picture, cut and pasting and even using model clay. My personal favourite is painting, I can paint for hours on end! These are fun, simple and inexpensive ways to keep your child creative and their minds active during the week. You can pick a daily theme for your crafting activities to keep things varied and encourage your child to try new things when it comes to crafting.
Grand & Toy has all you need to stock up your crafting drawers and keep your children (or grandchildren!) occupied throughout their vacation. You can conveniently order online and have all of your crafting (and office supplies if you like to multitask like me!) shipped to your home. Make it even more exciting for your kids by letting them join in the ordering process, picking out what they want to use to make their creations. Then watch their excitement grow as the parcel is delivered to your door!
Here are some of our crafting creations that we made with our supplies from Grand & Toy:
Watch out for more creations coming this week on Twitter and Instagram with the #GrandMarchBreak hashtag. Share your crafts with me and Grand & Toy online too! We love seeing what you are up to too.
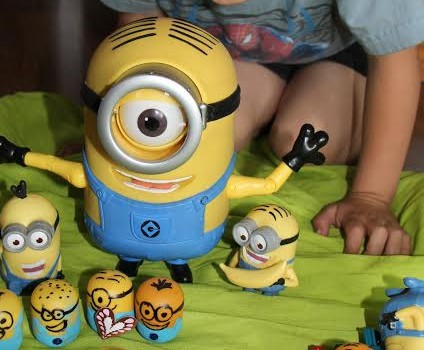
The famous minions are back and this time you can find them in Kinder chocolates!! Po ka?? (English translation from the Banana Language: What??).
Yes, you heard that right – in your favourite Kinder chocolates. Throughout this month, you can find these adorable little minions in store, in specially marked packages.
I was on the hunt for these packages for the last three weeks and I finally scored some at Walmart this past weekend. My boys and I decided to have a little bit of fun with our new minions by creating a league of minions out of all the spare Kinder capsules we keep in the home (they are the perfect storage for change!).
For this craft you will need:
Kinder capsules
blue and purple paint
black permanent marker
blue circular stickers
Directions:
Paint the bottom half of the capsules blue and leave upside down to dry. The ‘evil’ minions you will have to paint half of the capsule purple.
Once they are dry, use the permanent marker to add in the eyes, goggles and hair.
Add the stickers to the centre of their pants. We chose one of the minions to hold a heart and another to wear a flower in his hair (hence the sad face!).
And voila! A league of your own personal minions!
Our son set them up with his Minion toys in the living room and created his own ‘battle’ scenes. We had so much fun playing around with them.
Make sure you are following Kinder Canada on Facebook, Twitter and Instagram to keep up to date with this newest collection, fun giveaways and more!
Have you found the Minion collection in store? Out of the eleven available characters, how many have you collected?
Poopaye! Goodbye!
Disclosure: I am a KinderMom and receive perks associated with this affiliation. All opinions expressed are my own.
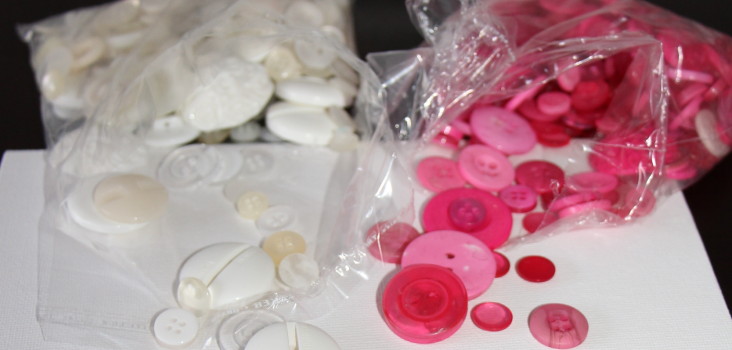
We decided for one of our Easter crafts this year, the boys and I would follow up on some of the Pinterest pins we had been pinning together and create a button Easter egg to place above the television in our living room.
This was one of the few Easter crafts that I had seen that looked not only simple (and it was!) but brightens up the room on a smaller budget. You can pick up all of the items needed at the Dollar Store (except for the glue gun) for all under five dollars! This was the perfect craft for us to do this week in preparation for Easter.
For this craft you will need:
buttons in your desired colour (I wanted to create a two tone egg so I chose pink and cream – definitely not the boy’s first choice in colours but Mom won this one!)
glue gun
white canvas board
Directions:
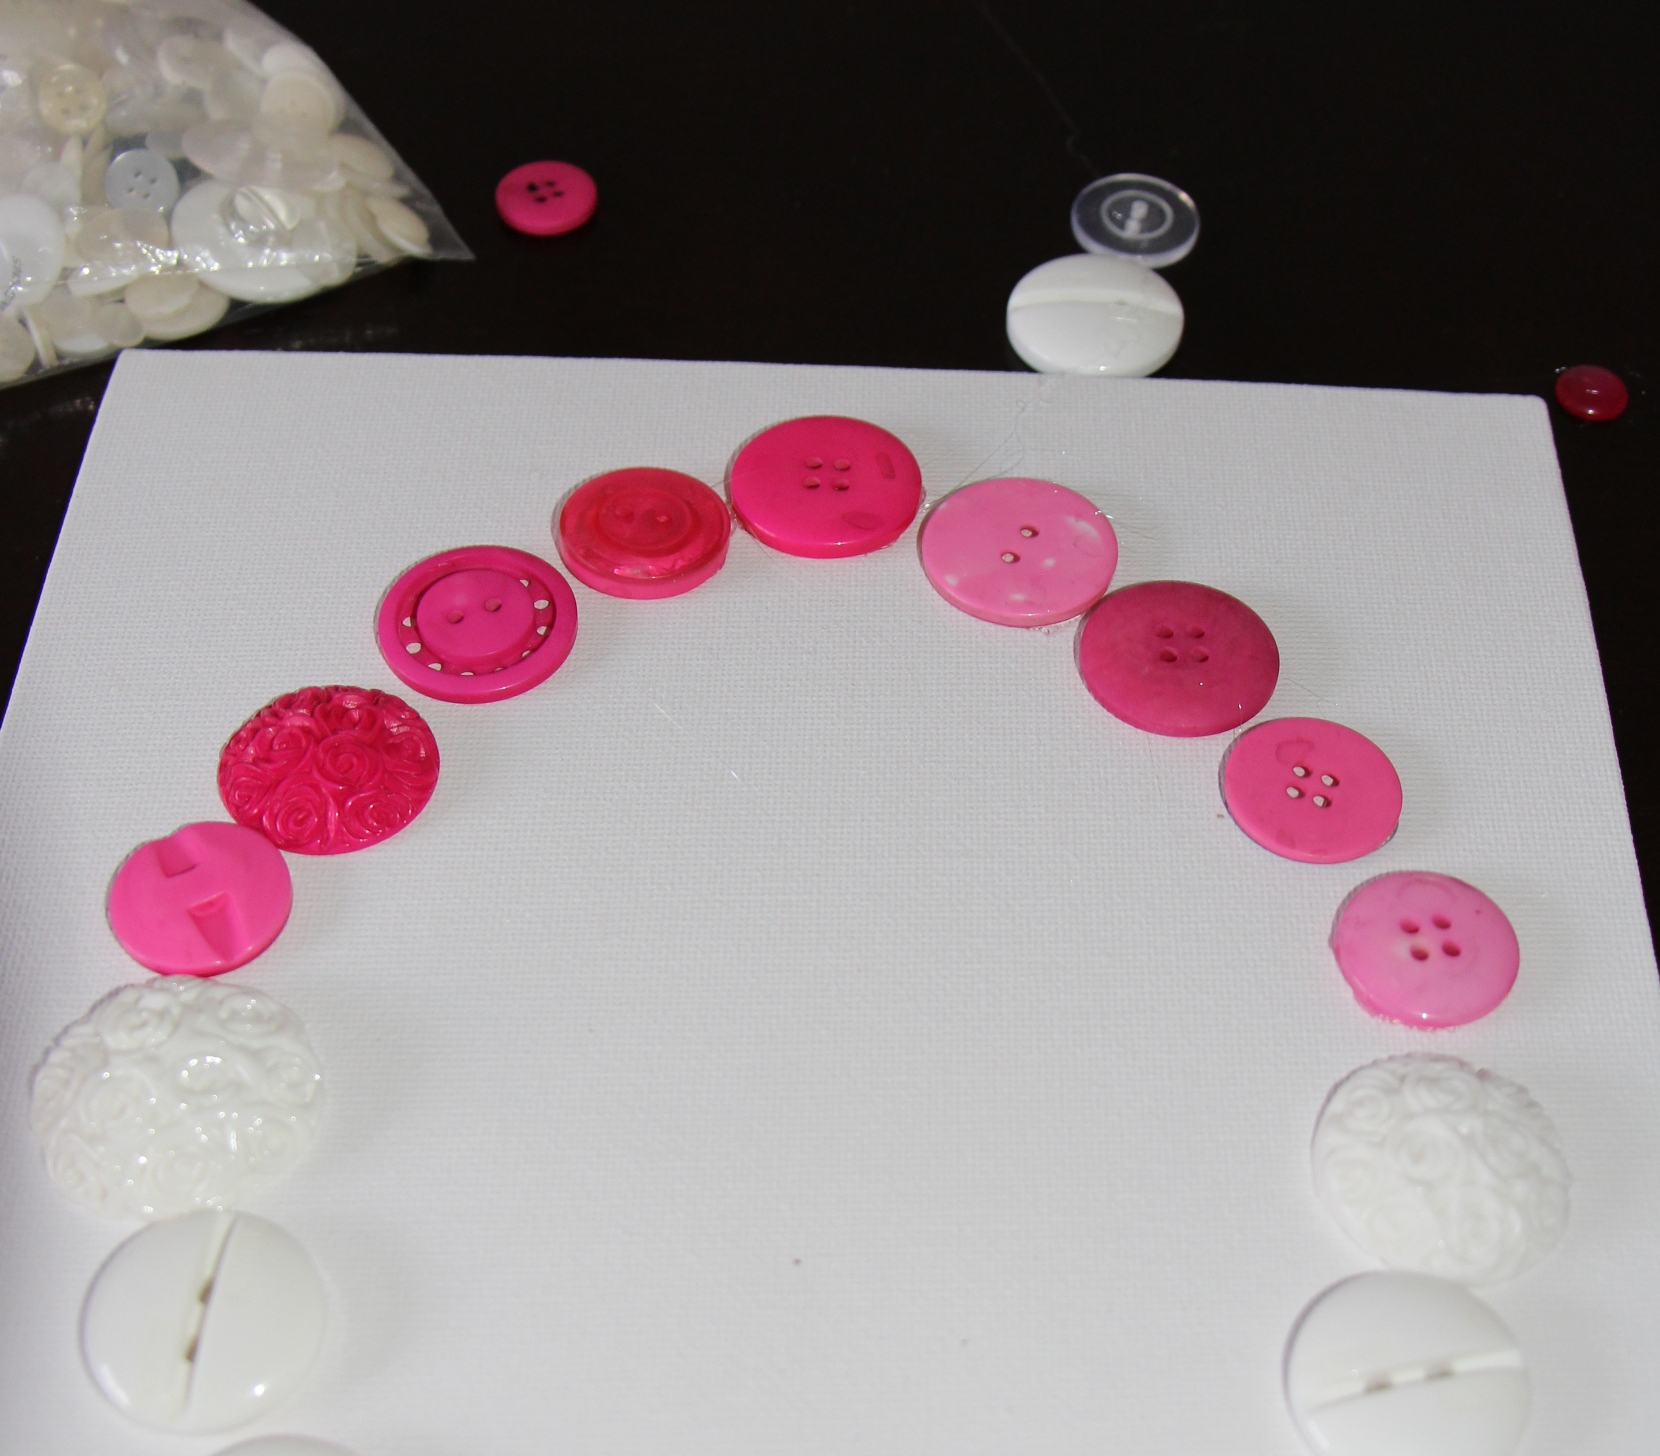
Design your egg on the canvas. I started by placing the buttons on the board in a design that I wanted. I originally wanted to create an egg that had a linear pattern alternating the pink and white buttons. I realized after putting the buttons on the canvas (or attempting to) that that was not going to work! So instead I decided to create an egg that was pink on one half and cream on the other.
After creating a design that you are happy with, it is time to start gluing! Carefully place some of the glue from the hot glue gun on the back of the button and apply it to the canvas board. Be careful to not get any glue on your fingers (my skill in this area has definitely not improved over time).
I loved how our Easter egg turned out in the end. What I realized after I finished gluing on the buttons was that the cream coloured buttons blended in to the canvas board too much. I wish I had painted the canvas board a dark black prior to gluing on the buttons. It was a lesson well learned though!
What kind of Easter crafts are you up to this week?
Do you love a fun game of Go Fish? We certainly do especially on game night!
Why not spice up your game of Go Fish and take it to a whole new level, Easter egg style!
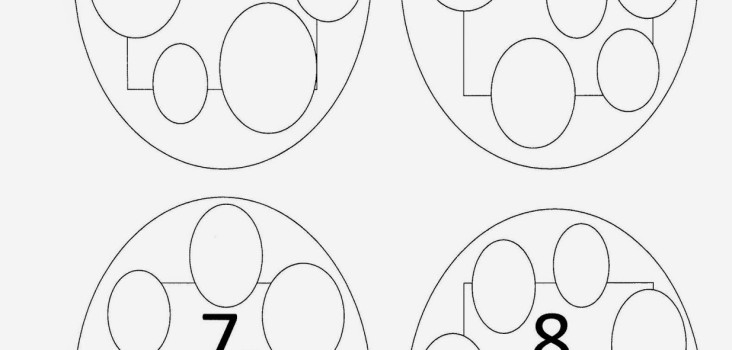
Cathy, from Cathy Thinking Out Loud, has put together these fantastic templates to help create your own game of Go Fish – Easter Style.
To put the cards together you will need:
printer paper
scissors
pencil crayons/crayons
Directions
Print out the two templates below seven times each. This will give you a total of fifty-seven playing cards.
Have your child colour in the template including the card and egg. They can go with traditional Easter colours or choose to change it up a bit. Let their creativity shine through here.
Assist your child in cutting out the egg-shaped card. If they are too young you can do this for them.
After the cards are cut out, shuffle them up and get ready for an exciting new way of playing Go Fish!
As a refresher, the rules of the game are:
Minimum of two players
Five to seven (depending on how you play) cards are dealt to each player. The remainder of the cards are placed in one pile in the middle.
Choose a starting player (in our house it is always our youngest, hands down he wins each time!).
Each player should remove duplicates and place in their own pile (to keep track of how many cards they have).
The first player will choose another player and ask them “Do you have a <insert number>”. That player will either respond yes and give them the card or “no – go fish!” and they will have to pick up another card.
The game continues to the left and ends when all the cards have been used. The winner with the most amount of cards wins!