Category: breakfast

Celebrating Family Around the Table with Hamilton Beach: Bread Maker

My favourite memories as a child and teenager were spent in the kitchen cooking with my Dad. I loved the holidays as we would prepare cannelloni, lasagna, veal and all types of desserts. I would spend half my time helping prepare the meals and the other half eating the ingredients (cannelloni stuffing is still my favourite – all of that delicious spinach and cheese goodness).

Good food and family were the two most important things we had growing up in our home. They were the centre of every happy, fun moment and especially around the holiday season. This is the gift I want to give my own kids – family and good food.

The one thing I always wished I learned how to do in my youth? Make bread.

There is nothing better then fresh, warm bread to accompany your meal (it is like a giant hug on a bad day). We always had a loaf of bread with every meal and I was always the first to volunteer to go pick one up at the bakery (I loved the smell and how the bag would just heat up). Not to mention, bread is the best way to clean up those dirty sauce pots over the holidays!

My only problem? I have been incapable of making bread from scratch – it doesn’t rise, it is still uncooked after it is finished cooking in the oven or it is rock solid. After many failed attempts, I gave up (my pride couldn’t handle the bad loaves and the teasing from the kids).

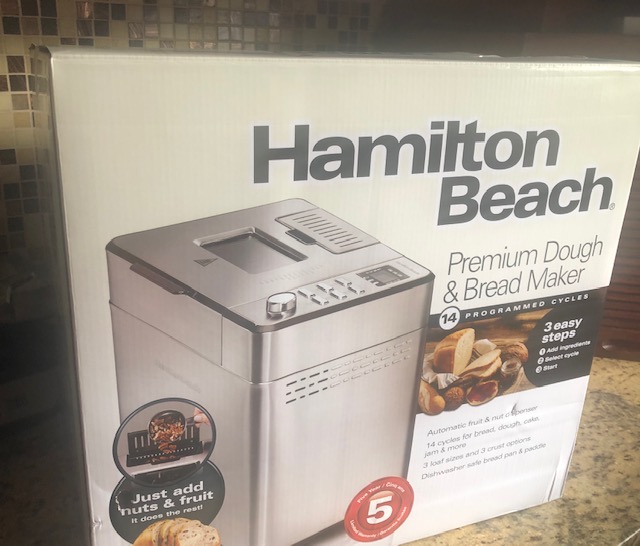
We were able to test out the Hamilton Beach Premium Dough and Bread maker leading up to the holiday season and I can honestly say that I am in love with this machine.

The Hamilton Beach Premium Dough and Bread maker is on the bigger size but it does tuck away perfectly in our pantry closet, although I tend to leave it on my counter as it fits right in the corner. It has a beautiful, sleek stainless steel design so it can match any kitchen decor and will fit in with your other appliances.

The bread maker looks intimidating at first but it is actually very simple to use. You adjust each setting with the turn of the dial (which for me was the hardest part to learn) – making changes for the type of bread, loaf size and the crust colour (light, medium or dark). Once you have added all of your ingredients, adjusted the settings – it does the rest for you. You can literally just step away and enjoy the smell of the bread rising, warming and baking.

The clean up? Surprisingly very simple. My husband teased me a bit thinking that the machine would be messy on the inside but I could clean the inside with a paper towel. There was no sticky dough left in the machine (similar to when you make the bread by hand) and the pan that contains the ingredients was simple to wash in the sink. Nothing stuck to any of the parts, except for a bit of dry crust on the mixer piece.

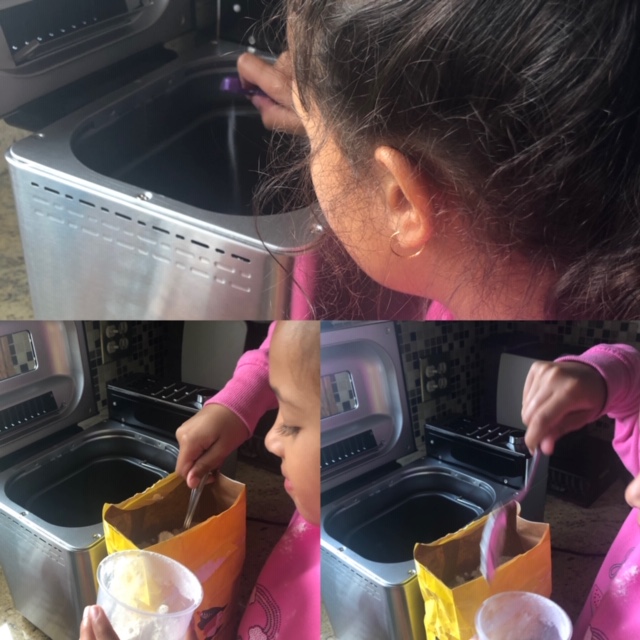
Hamilton Beach has a great selection of recipes on their website – we have been using the French bread and Italian Parmesan recipes. Both have become huge hits in our home and take roughly three to four hours to bake with roughly a five minute prep time. So no excuses for not being able to make fresh bread, you can whip those ingredients out and have them in the machine in five to ten minutes.

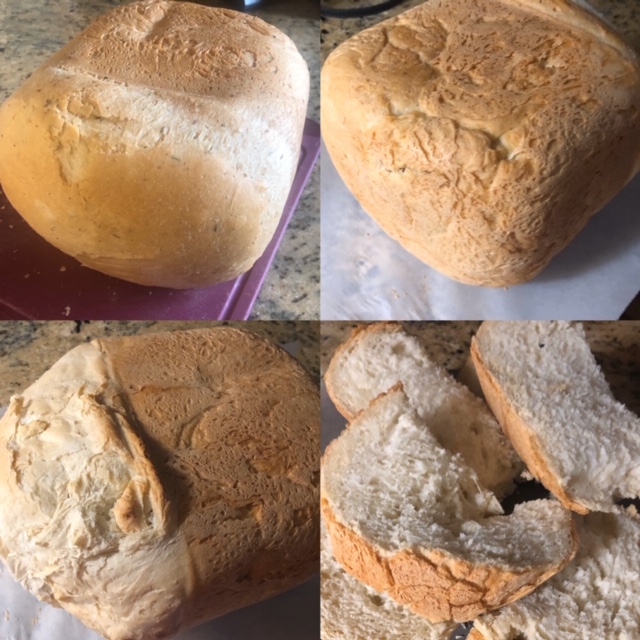
The bread always came out perfectly, despite being paranoid the whole time that it wouldn’t work. The first time we made the french bread we realized we didn’t like the recommended crust colour (it came out a bit harder, which I know french bread can be but my kids like their bread softer) so the next time we went for a medium and it was perfect. Be careful when you are removing the pan from the machine, it gets very hot! I burnt the edge of my finger on the fourth time, but everyone was so excited to snag a piece of bread that they didn’t notice I hurt myself (no worries, it didn’t even blister!).

The bread maker made it possible for us to enjoy delicious home made bread with minimal effort, mess and clean up. Every recipe came out exactly as expected and added that missing piece from my childhood.

Do you have a baker in the family? This would make a perfect gift for the holiday season for them. The machine is roughly $149 Canadian, you can find more details on their website here.

Make sure to follow Hamilton Beach on Facebook, Instagram and Twitter to keep up to date with the latest recipes and products!

Disclosure: I received the above mentioned product in order to facilitate this review. All opinions expressed are my own.

Continue Reading

Strawberry Oatmeal Cups

Strawberry Oatmeal Cups

As part of my committment to healthy living and cleaner eating, one of the first areas I needed to clean up was my breakfast. I used to always opt for quick and easy which sometimes meant I was not choosing the healthiest options that I could have. So I wanted to combine my favourite ingredients, oatmeal and strawberries, to make a simple, clean and easy to eat on the go breakfast item.

Strawberry Oatmeal Cups

These easy to prepare oatmeal cups were a huge hit not only in my house but also at work. They are light on the stomach (no flour!) but still sweet and satisfying will all the fruits that are added in.

Strawberry Oatmeal Cups

Ingredients

  • one egg
  • one tsp vanilla extract
  • one cup unsweetened applesauce
  • one banana (mashed)
  • 1/4 cup of honey
  • 2 1/2 cups of rolled oats
  • one tbsp ground cinnamon
  • 1 1/2 tsp of baking powder
  • 1/2 tsp of salt
  • 1 1/4 cups of milk (or almond milk)
  • seven to eight strawberries thinly sliced

Directions

Preheat your oven to 350F.

Mix together the egg, vanilla extract, applesauce, mashed banana and honey all in one large bowl.

Add in the oats, cinnamon, salt and baking powder. Make sure to mix these ingredients together well.

Strawberry Oatmeal Cups

Add in the thinly sliced strawberries to your mixture and mix well.

Strawberry Oatmeal Cups

Evenly place the mixture in muffin liners in a tray. Pour roughly enough mixture to fill about 3/4 of each liner.

Strawberry Oatmeal Cups

Cook in the oven for roughly thirty minutes or until a toothpick is inserted in the middle of each muffin and comes out clean.

Strawberry Oatmeal Cups

Enjoy!

Continue Reading

Breakfast Muffins #recipe

Breakfast is the busiest time of the day in our home as we try to get everyone up, fed and ready to head out the door. Since breakfast is one of the most important meals of the day we don’t want to miss out! This simple to prepare and bake recipe has quickly become a favourite in our home. The bonus? It also doubles as the perfect snack on the go!

Ingredients

  • One cup of shredded zucchini
  • One cup of shredded carrot
  • One cup of finely cut red peppers
  • Six extra large eggs
  • Twelve muffin liners


Directions

  • Preheat your oven to 350F.
  • Shred your zucchini and carrots and set aside in a bowl. Finely cut up your red peppers and place in the bowl.
  • Crack six extra large eggs, add about a tbs of water and mix together.
  • Slowly pour the eggs on top of the vegetables. Mix the egg mixture in well so that the vegetables are evenly spread out. 
  • Place one muffin liner into each muffin hole in the baking tray. I prefer using the liners to make for an easier clean up. Using a spoon pour the mixture into the muffin liners. Ensure that each muffin is roughly the same level.
  • Place in your oven and allow to cook for 15-20 minutes – because of varying oven times check the muffins out at the fifteen minute mark. If the egg is cooked remove them from the oven. If not allow the extra couple of minutes to ensure that the egg is cooked.

You can store the extras in your fridge and warm them up for when you are hungry. Do you have a go to breakfast recipe for busy mornings?

Continue Reading

Banana Cinnamon Raisin Bites

I was so excited to be able to participate in the Sun-Maid Canadian Family recipe contest this year!
My husband loves his raisin bread but we tend to eat it plain and just toasted. So we were all really excited to be able to shake things up a bit and make something unique for our family.
We began to brainstorm ideas and some important criteria for us were: quick, simple, fruits and fun! My boys love their bananas and strawberries so we definitely wanted to include them in our recipe. In the end we ended up with two different versions of the same recipe. One is simpler and perfect for after school and the second takes an extra ten minutes in the oven but still easy to make.
The ingredients for both are exactly the same. You will need:
– three bananas
– 1/4 cup of Maple syrup
– 1/2 cup of strawberries
– 6 slices of Sun-Maid Raisin Cinnamon Swirl Bread
Directions:
1. Cut the bananas into thin slices.
2. Cover the bananas with Maple Syrup and mix until evenly covered (this is my favourite part and tastes so yummy!).
3. At this point, you can either go one of two ways. The first way is to lightly toast the Sun-Maid Raisin Cinnamon Swirl bread. Cover with banana and syrup mix. Top with strawberries. We cut our strawberries in half and put the bananas in the middle and covered the whole thing with more syrup.
4. The other way we completed the recipe was by arranging the bread in cupcake pans (this was quite tricky and required some patience!). Then we poured the banana and syrup mix on top. We then baked them at 350F for just under ten minutes (oven times may vary – you only want to lightly toast the bread otherwise the bananas will soak through and stick to the pan). Remove the bread from the pan and place into individual bowls (we used our ice cream bowls!). They had such a unique shape to them – our son said they looked like little flowers! Add some extra syrup and bananas on top, sprinkle with strawberries – enjoy!
I wish we had almond slivers to sprinkle on top of the strawberries as well but they tasted delicious as is. The total prep time for this was under five minutes and total cook time between 5-15 minutes depending on which version you use.
What is your favourite way to enjoy raisin bread?
Continue Reading

Strawberry Banana Smoothie

I have just found my number one favourite smoothie!
I decided this weekend that I needed to clean up my food and eat healthier as my skin and stomach were suffering from my poor habits. So I thought what better way to start this off then by trying out a new smoothie for breakfast!
The whole preparation and making the smoothie took me under ten minutes, which is perfect for the morning rush. Here is what I did:
Ingredients:
– 1 cup of Almond Fresh Vanilla milk
– 1 cup of frozen strawberries
– 1 banana
– 2 teaspoons of flax seed
Directions:
1. Combine all ingredients into the blender and blend until smooth. Pour and enjoy!
Super simple! And so delicious – was a perfect snack for breakfast at work!

Continue Reading